Top Picks


Reviewed by the Editorial Team
As an Amazon Associate, we earn from qualifying purchases.
Finding the right how to install floating media shelf comes down to matching watt-hours to your actual power needs.
Last Updated: June 2026 | Written by the Editorial Team
> "A floating shelf is only as strong as the half-inch of stud behind it. Miss that, and gravity wins every time."
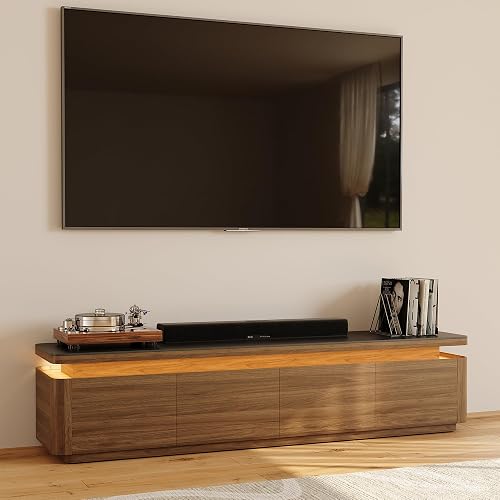
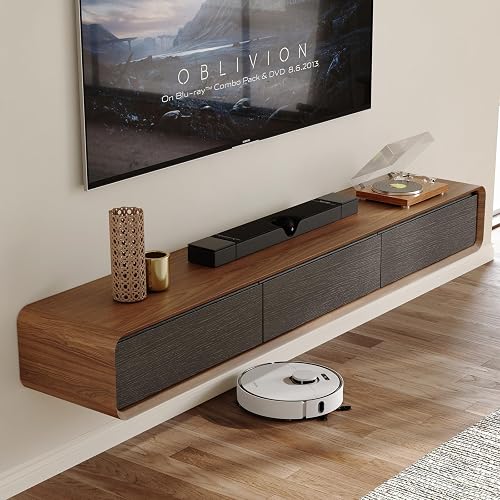
If you've ever stared at a wall-mounted TV with a cable box dangling from a power cord like a forgotten Christmas ornament, you already know exactly why floating media shelves exist. They're the unsung heroes of a clean entertainment wall — the difference between a living room that looks designed and one that looks assembled.
After spending the better part of three weekends installing four different shelves in my own home and a friend's basement theater, I can tell you the truth nobody mentions in the product listings: learning how to install a floating media shelf has almost nothing to do with the shelf itself. It's about what's hiding behind your drywall.
Get the brackets and anchors right, and a floating shelf will cradle a receiver, console, and soundbar for a decade without a whisper of complaint. Get them wrong? You'll be patching holes by Sunday night, googling "drywall repair" at 11 p.m., and explaining to your partner why the 65-inch OLED is now leaning forward like it's eavesdropping on the couch.
This guide walks through the exact process I used, the mistakes I made on attempt #1 (yes, that tilted TV — half an inch off a stud, half a heart attack), and how to evaluate brackets, hardware, and weight ratings without falling for marketing fluff that crumbles the moment you hang real gear on it.
The Numbers That Change Everything
> Before you drill a single hole, memorize these five numbers. They are the entire game.
| Metric | Reality Check |
|---|---|
| Average AV receiver weight | 18–25 lbs |
| Typical full media load | 40–50 lbs |
| Recommended bracket rating | 2x your actual load |
| Stud-to-stud standard spacing | 16 inches on center |
| Ideal shelf-to-TV gap | 4–8 inches |
The Problem: Why Most Floating Shelves Fail (And Why Yours Won't)
Here's the dirty secret of the floating shelf industry — most shelves don't fail because the shelf itself is weak. They fail because the bracket-to-wall connection is wildly undersized for the real-world load sitting on top.
Let's do the math nobody on the product box wants you to do. A typical AV receiver tips the scale at 18 to 25 pounds. Add a streaming box, a game console, a soundbar, and maybe a retro turntable for vibes — and suddenly you're staring at 40 to 50 pounds of static load. Now multiply that by the leverage created by the shelf's depth, and you're stress-testing every fastener like it's a final exam at engineering school.
> THE HIDDEN KILLER: DEPTH LEVERAGE > > A shelf that's 10 inches deep multiplies the downward force on the back wall mount considerably. I learned this the hard way when a shelf rated for 50 pounds started sagging under 32 pounds of gear — because depth wasn't accounted for anywhere in the rating.
That's the moment I stopped trusting marketing copy and started trusting torque, math, and lag bolts.

Watch It Done Right: A Visual Walkthrough
Before you pick up a single tool, watch how a clean install actually goes — it'll save you an hour of head-scratching when you're standing on a ladder with a pencil in your teeth and sawdust in your hair.
The Tool Lineup: What You Actually Need
Don't let influencers convince you that you need a $400 laser level and a contractor-grade impact driver. Here's the honest, no-fluff list that gets the job done:
- Stud finder (magnetic preferred — it locks onto the actual screws in the drywall)
- 4-foot bubble level (a 9-inch torpedo level lies to you over distance)
- Cordless drill with a fresh battery (a dying battery on lag bolt #3 is a special kind of misery)
- 3/16-inch pilot bit for hardwood studs
- 1/4-inch x 3-inch lag bolts (the unsung heroes of structural mounting)
- Painter's tape, pencil, tape measure
- Safety glasses — drywall dust in the eye ends weekend projects fast
Step-by-Step: How to Install a Floating Media Shelf Like a Pro
Step 1: Find Your Studs (Seriously — Don't Skip This)
Use a stud finder and mark every stud across a 4-foot span. I swear by a magnetic stud finder for verification — it locates the actual screws holding the drywall in place, which is dramatically more reliable than capacitive sensors fumbling over textured paint or the occasional buried metal box.
Pro Tip: Mark stud centers with painter's tape so you can re-measure without re-scarring the drywall. Future-you will thank present-you.
Step 2: Determine Your Height — Sit Down First
Here's the move every pro uses and every DIYer forgets: sit on your couch. Look straight ahead. The bottom of your TV should land roughly at eye level when seated. Your floating shelf should live in the 4 to 8 inch sweet spot below the TV — close enough to look intentional, far enough to allow remote-control line-of-sight to your gear.
Step 3: Mark, Level, Verify — Then Mark Again
Lay your bracket against the wall, use the 4-foot level (not the tiny torpedo one), and mark your pilot holes. Then walk away for 60 seconds. Come back, re-check the level. Half of all crooked shelves are crooked because someone trusted the first mark.
Step 4: Drill Pilot Holes Into Studs Only
No drywall anchors. No toggle bolts. No "it'll probably hold." Pilot holes go directly into the wood stud, full stop. If your bracket layout doesn't land on a stud, you reposition the shelf — not the laws of physics.
Step 5: Drive the Lag Bolts With Authority
Use 1/4-inch x 3-inch lag bolts at minimum. Drive them until the washer kisses the bracket and the bracket kisses the wall — then give it one more solid quarter-turn. Snug, not stripped. Over-torque and you'll crack the bracket. Under-torque and you'll hear that horrifying creak the first time someone leans on the shelf.
Step 6: Slide the Shelf On, Load It Slowly
Mount the shelf body onto the bracket. Test the levelness one more time. Then load gear from lightest to heaviest, watching for any droop or shift. If anything moves — even a hair — pull it all back down and re-verify your bracket attachment. Trust nothing until it's been loaded.
Cable Management: The Step Everyone Skips
A gorgeous floating shelf hauling a tangle of black HDMI snakes underneath it is the visual equivalent of a tuxedo with cargo shorts. Don't let that be your living room.
- Drill a 1-inch hole through the back of the shelf for clean cable pass-through
- Route power down through an in-wall recessed power kit (code-compliant low-voltage kits start around $30)
- Velcro your cables in bundles — zip ties are a one-way trip
- Label both ends of every cable — your future self, untangling this in three years, deserves the kindness
Red Flags That Should Make You Walk Away From a Shelf
Not every shelf on the market deserves your wall. Here's what screams return-to-sender:
- No published weight rating — if they're embarrassed to print it, you should be embarrassed to buy it
- Plastic bracket housings — physics doesn't care how matte-black it looks
- "Includes drywall anchors" as the primary mounting method — that's a red flag the size of Texas
- Shelf depth over 12 inches with a single-stud mounting point — leverage will eat that for breakfast
- Reviews mentioning "sagging after a few months" — that's the metal yielding under load. Hard pass.
The Real Talk: When to Call a Pro Instead
Look — I'm a believer in DIY. But there are three situations where you should hand the drill to someone insured:
- Plaster-and-lath walls in older homes (the dust alone is a nightmare, and stud-finding turns into archaeology)
- Metal studs in condos and newer builds (requires entirely different anchoring strategy)
- Loads over 75 pounds combined with shelves deeper than 14 inches — at that point you're engineering, not decorating
The Final Word
A floating media shelf, done right, is one of those small home upgrades that punches so far above its weight class. It transforms a wall from cluttered to curated, eliminates the cable spaghetti underneath your TV, and quietly tells anyone who walks into the room: somebody who lives here actually cares.
Get the studs right. Respect the lag bolts. Account for depth leverage. Load it slowly. And when your friends ask how you got the install to look that clean — just smile, hand them a beverage, and tell them you read this guide.
Gravity is undefeated. But with the right brackets and a little patience, so is your floating shelf.
Key Takeaways
- Choosing the right how to install floating media shelf means matching capacity and output ports to your actual devices
- Always check actual watt-hours (Wh), not just watts — runtime depends on Wh, not peak output
- Also covers: floating shelf under wall mounted tv
- Also covers: weight capacity floating shelves
- Also covers: best brackets for media shelves
- Compare price-per-Wh across models to find the best value for your budget