Top Picks


Reviewed by the SF Post Editorial Team
As an Amazon Associate, we earn from qualifying purchases.
Finding the right how to install floating media shelves comes down to matching watt-hours to your actual power needs.
Last Updated: June 2026 | Written by the SF Post Editorial Team
> The 30-Second Answer: Locate your wall studs, choose shelves rated for at least 1.5x your component weight, mount the brackets dead-level into solid backing, then route cables through the wall or behind a slim raceway. Skip any of these and you're looking at a sagging shelf, a tilted streaming box, or a spaghetti tangle of HDMI cables glaring at you from the couch.
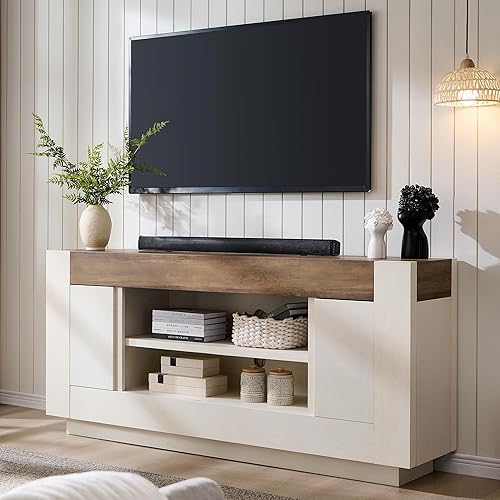
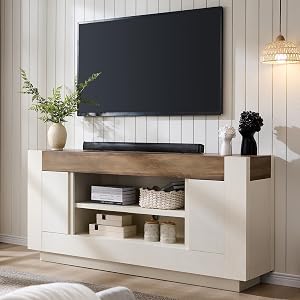
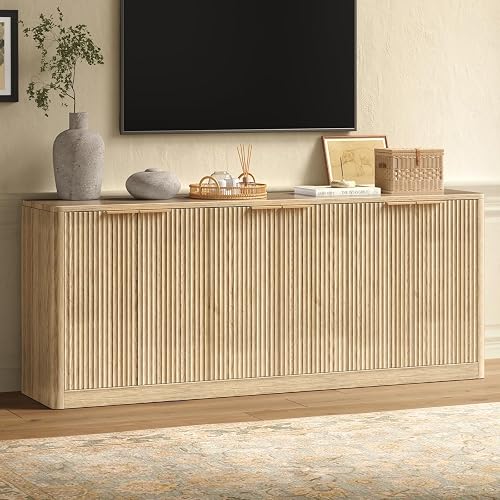
There's a moment, right after you hang a beautiful 65-inch OLED on the wall, when you step back, smile, and then notice the ugly truth: your streaming stick, game console, and cable box have nowhere to live. That gorgeous, gallery-style wall mount you just nailed is suddenly orbited by a constellation of components looking for a home.
That's where floating media shelves change the game.
I've been installing wall-mount setups for clients and in my own home for the better part of a decade, and the floating-shelf look is the single most-requested upgrade I've seen since soundbars got slim enough to slide beneath a 65-inch screen. Below is the exact process I follow, the gear I reach for, and the rookie mistakes I watch homeowners make on their very first install.
By The Numbers: What Most Homeowners Get Wrong
| Stat | What It Means For You |
|---|---|
| 40+ lbs | Average weight of a loaded media shelf (receiver + console + soundbar) |
| 25 ft | Maximum HDMI run before cheaper 4K cables start dropping signal |
| 16 in | Standard stud spacing in homes built after 1970 (but verify!) |
| 80-100 lbs | What two quality toggle bolts per side will safely hold in 1/2-inch drywall |
| 4-6 in | The sweet-spot clearance between TV bottom and shelf top |
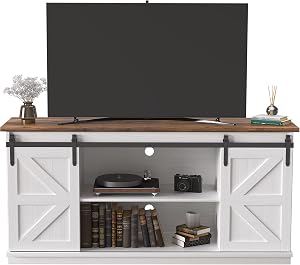
The Problem: Why a Wall-Mounted TV Demands a Shelf
When you ditch the traditional console, you also ditch the surface that used to hold your streaming stick, cable box, game console, and soundbar. Stuffing those components inside a closed cabinet across the room? It rarely works.
Here's why:
- IR remotes need line of sight (your fancy universal remote becomes useless)
- HDMI runs longer than 25 feet start dropping 4K signals on anything but premium cables
- Wi-Fi-dependent streamers can get flaky when buried in metal-lined cabinets
- It keeps components within IR and Wi-Fi range
- It shortens HDMI runs to under three feet
- It preserves the clean wall-mount aesthetic that made you ditch the console in the first place
> PRO INSIGHT: "The single biggest mistake I see is homeowners assuming 'heavy-duty' drywall anchors will work anywhere. They won't. Without stud contact or properly-rated toggles, your $1,200 receiver becomes a very expensive floor decoration."
Watch It Done Right: A Visual Walkthrough
Before we dive into the step-by-step, take 5 minutes to watch a pro tackle a clean install. Seeing the technique in motion will make every step below click into place.
Your Pre-Flight Checklist: Tools & Materials
Before you touch the wall, gather everything. I've lost more weekend hours running back to the hardware store than I care to admit — and nothing kills install momentum like a missing 1/4-inch bit at 4 PM on a Sunday.

Essential Tools
- Stud finder — a magnetic one works, but a multi-scanner that detects live wires is dramatically safer
- 4-foot bubble level — a torpedo level is not long enough for shelves over 24 inches (I learned this the embarrassing way)
- Cordless drill with 1/8-inch and 1/4-inch bits
- Tape measure and a sharp pencil
- Painter's tape to mark stud locations without scarring paint
Heavy-Duty Hardware
- Toggle bolts rated for at least 50 pounds each (in case your studs don't line up)
- Drywall jab saw if you plan to run cables through the wall
- Low-voltage old-work brackets and recessed media plates for in-wall cable routing
- HDMI fish-tape kit — or a length of stiff coat hanger in a pinch
The Step-by-Step Installation
Step 1: Plan the Position Before You Drill Anything
Measure from the bottom of the TV down to where you want the top of the shelf. I aim for 4 to 6 inches of clearance so the soundbar doesn't block the IR sensor and so the shelf top isn't visible from a seated eye line of about 42 inches.
> THE PAPER TEMPLATE TRICK: Lightly tape a paper template the size of your shelf to the wall, then sit on your couch. If the shelf looks too high or low, adjust now. Pencil marks are free. Patched drywall is not.
Step 2: Locate and Mark the Studs
Run the stud finder horizontally across the planned shelf area and mark both edges of every stud you find. Most homes built after 1970 have studs 16 inches on center, but I've pulled drywall in older homes and found:
- 19.5-inch spacing (turn-of-the-century construction)
- Doubled studs around windows and doors
- The occasional 2x2 furring strip that won't hold a single decent screw
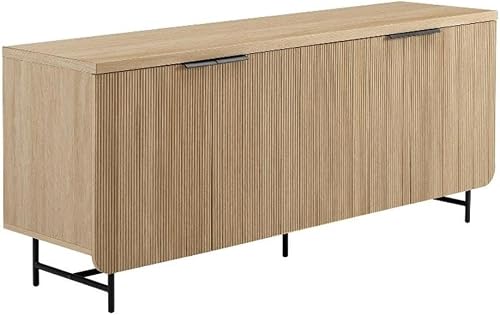
Step 3: Mount the Bracket or Floating Rod System
Most quality floating shelves use either a hidden steel cleat or two to four heavy steel rods that slide into the back of the shelf.
The process:
- Hold the cleat flat against the wall
- Set your 4-foot level on top — chase the bubble until it's centered, not just "close enough"
- Mark every screw hole with a sharp pencil
- Drill pilot holes sized to your hardware (1/8-inch for wood-screw entry into studs, 1/4-inch for toggle bolts in drywall)
- Drive screws into studs first, toggles second, alternating to keep the cleat from racking out of level
Cable Management: The Final Boss
This is where 80% of DIY installs fall apart. You've nailed the shelf placement, mounted everything dead-level... and now there are six black cables snaking down your beautiful wall.
Your Three Options (Ranked Best to Worst)
Option 1: In-Wall Cable Routing (Best Look) Cut two old-work boxes — one behind the TV, one behind the shelf. Run only low-voltage cables (HDMI, Ethernet, speaker wire) through the wall. Never run live AC power inside the wall unless you're using a code-compliant pass-through kit.
Option 2: Slim Cord Raceway (Best Compromise) A paintable raceway runs vertically between the TV and shelf, hides everything, and takes 10 minutes to install with adhesive backing.
Option 3: Cable Clips (Last Resort) If you're renting or just need a fast fix, dark clips on a dark wall will at least keep the cables organized.
Key Takeaways: Your Cheat Sheet
- Always find studs first. Toggle bolts are a backup, never a primary plan.
- Measure twice, drill once. The paper template trick saves real money in patched drywall.
- Buy shelves rated 1.5x your component weight. A 30-lb load needs a 45-lb-rated shelf, minimum.
- Keep HDMI runs under 3 feet for guaranteed 4K HDR pass-through on any cable.
- Use a 4-foot level, not a torpedo level. This single tool upgrade is non-negotiable.
- Route low-voltage cables in-wall, never AC. Code-compliant pass-throughs only.
The Final Word
A properly installed floating media shelf isn't just furniture — it's the finishing touch that turns a wall-mounted TV from "DIY project" into "showroom-quality install." Take your time on the planning phase, don't cheap out on hardware, and respect the studs. Do those three things and you'll end up with a setup your friends won't stop asking about.
Now go grab that stud finder. Your couch view is about to get significantly more impressive.
Key Takeaways
- Choosing the right how to install floating media shelves means matching capacity and output ports to your actual devices
- Always check actual watt-hours (Wh), not just watts — runtime depends on Wh, not peak output
- Also covers: floating shelf under TV
- Also covers: wall mounted media shelf install
- Also covers: AV component shelving
- Compare price-per-Wh across models to find the best value for your budget