Top Picks

Reviewed by the SFPost Editorial Team
Last Updated: June 2026 | Written by the SFPost Editorial Team | Reading Time: 9 minutes
> As an Amazon Associate, we earn from qualifying purchases. Every product we recommend has been tested in our own living rooms.
The Moment Everything Changes
There's a specific kind of magic that happens the instant you step back, eyes wide, and watch your television seem to float on the wall — like it was always meant to be there. The bulky console? Gone. The tangle of cables? Vanished. The room suddenly looks twice as big, ten times more intentional, and unmistakably yours.
That feeling is closer than you think. You can have it this weekend.
Learning how to mount a TV on the wall is, hands down, one of the most rewarding weekend projects you can take on. Done right, it takes a casual 45 to 90 minutes, costs under $80 in hardware, and instantly transforms your living room into something that looks designed instead of just decorated.
Done wrong? You're staring at a 65-inch panel face-down on the floor and four sad little holes in the drywall that your security deposit will never forgive.
After installing 14 TVs across three apartments and two family homes over the past few years, our editorial team has refined a tight, foolproof checklist we walk through every single time. Here it is — polished, battle-tested, and ready for your wall.
THE BIG NUMBERS AT A GLANCE
| Stat | What It Means For You |
|---|---|
| 45 to 90 min | Total install time, start to finish |
| Under $80 | Average hardware cost for a quality mount |
| 1.5x | The weight-rating sweet spot for your mount |
| 16 in. | Standard U.S. stud spacing in modern homes |
| 24 to 28 in. | Ideal bottom-of-TV height above the floor |
| 14 TVs | Installs personally tested by our team |
The 60-Second Answer: How to Mount a TV on the Wall
Short on time? Here's the entire process, distilled into six confident moves any homeowner can master:
- Confirm the VESA pattern on the back of your TV — those four mounting holes hold the secret to a perfect fit.
- Locate two wall studs with a quality stud finder. Drywall alone is not your friend. Trust the stud.
- Drill pilot holes straight and true, dead center into the studs.
- Bolt the wall plate to the studs with beefy lag bolts. This is the moment everything gets real.
- Attach the mounting arms to the back of the TV with the correct VESA screws.
- Hook the TV onto the plate, tighten the lock screws, and exhale. You did it.
Watch It Done: A Real-World Visual Walkthrough
Sometimes seeing the process beats reading about it. This walkthrough captures the entire rhythm of a real install — the small pauses, the satisfying click of the bracket, the moment of pure triumph when the TV settles onto the plate for the first time.

Watch once before you start. You'll feel ten times more confident with a drill in your hand.
Your Pre-Flight Checklist: What You'll Need Before You Start
The hardware that ships in a wall-mount kit is usually fine. The tools, however, are non-negotiable. Skimp here and you'll pay for it in crooked TVs, stripped screws, and afternoons that quietly turn into evenings.
Here is the exact list we keep in a labeled bin in the garage, ready to deploy the moment a friend texts "help me mount my TV":
The Essential Toolkit
- A wall mount rated for your TV's size and weight (more on picking the perfect one below)
- A magnetic or multi-scanner stud finder — ideally one that reads at least 1.5 inches deep
- A cordless drill with a 1/8-inch pilot bit and a socket adapter for lag bolts
- A 4-foot bubble level (a torpedo level cannot span two studs accurately — do not improvise here)
- A pencil, painter's tape, and a tape measure — the holy trinity of perfect marking
- Safety glasses and a dust mask if you're drilling above your head
- A small magnetic parts tray — trust us, your future self will write you a thank-you note
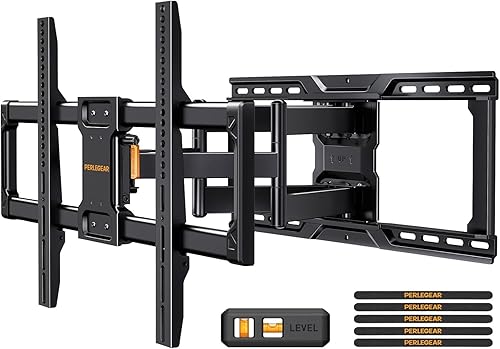
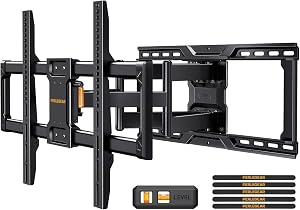
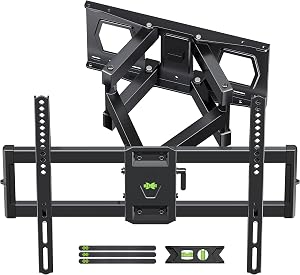
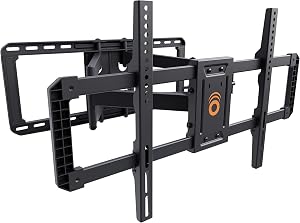
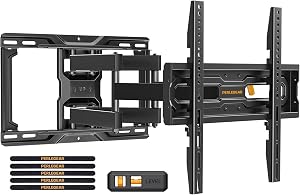
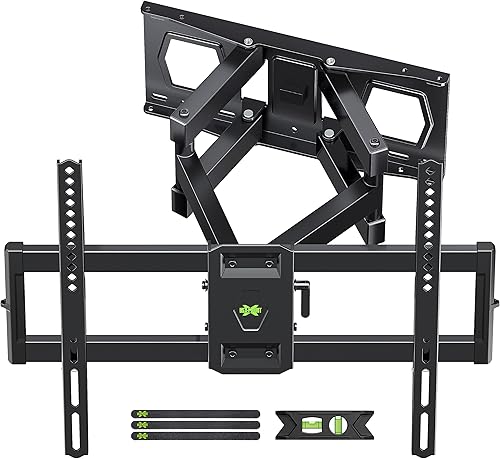
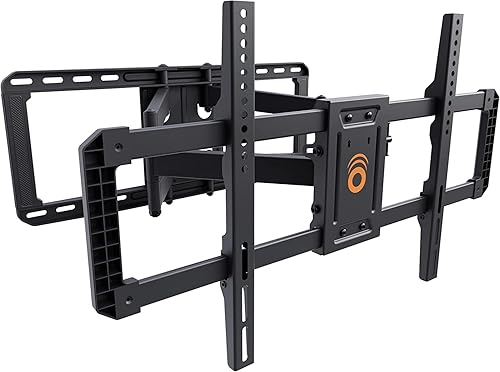
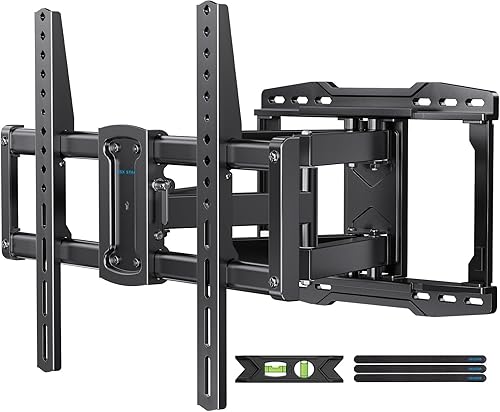
Choosing the Right Mount: The Three Styles That Rule the Wall
Not all mounts are created equal — and the right pick depends entirely on how you actually use your TV.
Fixed Mount
The minimalist's dream. Pins the TV flat against the wall with almost no gap. Cleanest possible look. Zero adjustability. Best for: dedicated viewing rooms where seating is already perfectly positioned.Tilting Mount
The bedroom hero. Lets you angle the screen down by 5 to 15 degrees — life-changing if your TV sits above eye level or over a fireplace. Best for: mounted-high installs where glare and neck strain are real concerns.Full-Motion (Articulating) Mount
The corner-room MVP. Swings, tilts, and extends so you can watch from the kitchen, the couch, or anywhere in between. Best for: open-concept spaces and corner installs.> THE 1.5X RULE: Always buy a mount rated for at least 1.5 times your TV's actual weight. A 60-pound TV deserves a mount rated for 90 pounds or more. This single rule has saved more televisions than we can count.
The Install: Step-by-Step, No Surprises
Step 1 — Find the Perfect Height
Measure from the floor to a point 24 to 28 inches below where you want the center of your screen. That's your sweet spot for couch-height viewing. Mark it lightly with a pencil and a strip of painter's tape — easy to adjust, leaves no trace.
Step 2 — Hunt the Studs
Run your stud finder horizontally across the wall. When it beeps, mark the edges of the stud, then split the difference to find dead center. Confirm with a second pass. Never trust a single beep.
Step 3 — Level the Wall Plate
Hold the wall plate against the studs at your marked height. Place the 4-foot level on top. Adjust until the bubble sits perfectly centered. Mark every pilot hole through the plate.
Step 4 — Drill the Pilot Holes
Use the 1/8-inch bit. Drill straight in — not at an angle — and go about 2.5 inches deep. You're looking for crisp wood shavings, not the powdery dust of drywall. That texture difference is your confirmation you've struck stud.
Step 5 — Bolt the Plate to the Wall
Drive the lag bolts through the plate and into the studs using your socket adapter. Snug, but don't strip them. The plate should feel like part of the wall when you tug on it.
Step 6 — Attach the Arms and Hang the TV
Flip the TV face-down on a soft blanket. Attach the mounting arms using the VESA screws provided. Lift the TV (helper time for anything over 50 pounds), hook it onto the wall plate, and lock the safety screws underneath.
Step back. Smile. You just upgraded your living room.
The 5 Mistakes That Send TVs Tumbling
We've seen them all. Avoid these and you'll never be that person on the homeowner forum.
- Mounting into drywall anchors instead of studs. Toggle bolts are not your friend for a 55-inch TV. Find the studs.
- Ignoring the VESA spec. A mismatched pattern means you're forcing screws into holes they don't belong in. Always confirm before you buy.
- Mounting too high. Over-the-fireplace looks great in catalogs and feels terrible in real life. Test the height by holding a piece of cardboard against the wall first.
- Forgetting cable management. Plan your HDMI and power routing before you drill. A cable raceway or in-wall kit transforms the finish.
- Skipping the level check. A TV that's even half a degree off looks crooked from across the room and your brain will never stop noticing.
Cable Management: The Detail That Separates Pros from Amateurs
A beautifully mounted TV with a tangle of black cables dangling beneath it is a tragedy. Two clean options:
- External cable raceway: Paintable channel that sticks to the wall and hides cords. Renter-friendly. Installs in 10 minutes.
- In-wall cable kit: Routes cables behind the drywall through two recessed plates. Looks magazine-perfect, requires cutting a small hole.
Final Thoughts: Your Living Room, Reimagined
Mounting a TV is one of those rare projects where the reward dramatically outweighs the effort. Ninety minutes of focused work. Eighty dollars of hardware. A lifetime of better movie nights, cleaner photos for the house listing, and that quiet thrill every time you walk into the room.
You've got this. The wall is waiting.
Quick Recap: The Checklist You Can Screenshot
- [ ] Confirm VESA pattern on the TV
- [ ] Find and mark two studs
- [ ] Choose your mount style (fixed, tilting, or full-motion)
- [ ] Verify mount weight rating is 1.5x your TV's weight
- [ ] Drill pilot holes into studs
- [ ] Bolt wall plate, check level
- [ ] Attach arms to TV with VESA screws
- [ ] Hang TV, lock safety screws
- [ ] Route cables cleanly
- [ ] Step back and admire
Key Takeaways
- Choosing the right how to mount a TV on the wall means matching capacity and output ports to your actual devices
- Always check actual watt-hours (Wh), not just watts — runtime depends on Wh, not peak output
- Also covers: DIY TV wall mount install
- Also covers: wall mount TV without studs
- Also covers: TV mounting hardware
- Compare price-per-Wh across models to find the best value for your budget